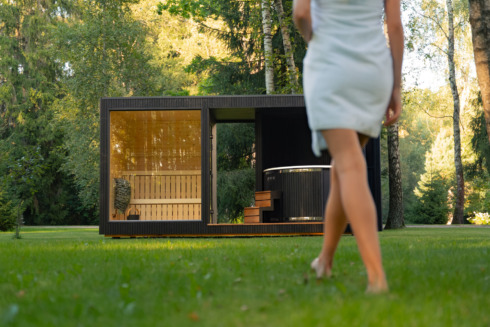
Building a sauna is more than a construction project. Done well, it creates a warm, restorative space that can become part of everyday life for many years. However, a sauna must also cope with unusually high temperatures, repeated humidity changes and significant differences between its indoor and outdoor environments. Good planning is therefore essential.
This guide explains the main stages of building a traditional indoor or outdoor sauna: choosing the location and size, planning the structure, selecting suitable timber, preparing the foundation, insulating and sealing the room, arranging ventilation, choosing a heater, building benches and completing the interior.
It is written as a practical overview rather than a substitute for project-specific engineering, electrical design or local building requirements. Electrical work, chimney installation and other regulated work should always be completed or approved by qualified professionals in accordance with the rules that apply in your country or region.
If you would prefer a professionally designed solution, explore the complete collection of Celsium outdoor saunas, indoor saunas and factory-prepared models in the Pre-Crafted Collection.
Decide What Type of Sauna You Want to Build
Before choosing timber or ordering a heater, decide what kind of sauna best suits your space, climate and preferred experience.
Indoor sauna
An indoor sauna is built inside an existing home, hotel, gym or wellness space. It is usually convenient to access and can make use of existing electrical services. Nevertheless, it requires careful moisture management, ventilation and coordination with the surrounding building.
Possible locations include:
- a bathroom or wellness room;
- a basement with suitable moisture protection;
- a converted spare room;
- a purpose-built extension;
- a commercial spa or fitness facility.
The room must be able to accommodate the sauna structure, heater clearances, ventilation openings and a safe outward-opening door. If the sauna is installed on an upper floor, the floor structure may also need to be assessed for the combined weight of the sauna, heater, stones and users.
For design inspiration and available formats, view the Celsium indoor sauna collection.
Outdoor sauna
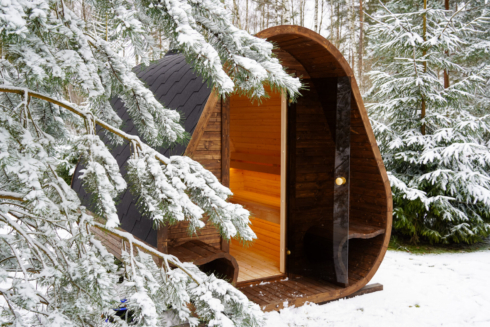
An outdoor sauna offers greater design freedom and creates a dedicated retreat away from the main living space. It can be placed in a garden, beside a pool, near an outdoor shower or as part of a larger wellness area.
Compared with an indoor sauna, an outdoor building requires additional planning for:
- ground conditions and drainage;
- foundations and frost movement;
- weather exposure and prevailing winds;
- roof drainage and exterior cladding;
- electrical or water connections;
- access for delivery and construction;
- planning permission, setbacks and local regulations.
Â
In colder, windy or highly variable climates, a fully insulated sauna normally offers more stable performance and improved heat retention. Read How to Choose the Right Backyard Sauna for Your Climate for a more detailed comparison.
Traditional, infrared or hybrid?
A traditional sauna uses an electric or wood-burning heater to warm the room and a mass of sauna stones. Water may be poured onto suitable heated stones to create löyly—the short rise in humidity that defines the traditional sauna experience.
An infrared sauna uses emitters to warm the body more directly and normally operates at a lower air temperature. A hybrid sauna combines traditional and infrared systems, allowing the user to choose between different types of heat.
If you are comparing these systems, read:
- Infrared vs Traditional Sauna: Which One Fits Your Lifestyle?
- Hybrid Sauna Advantages: Infrared and Traditional Heat
Â
The remainder of this guide focuses primarily on the construction of a traditional sauna.
Choose the Right Sauna Size and Layout
The best sauna is not necessarily the largest one. A compact, well-proportioned room usually heats more efficiently and can provide a better bathing experience than an oversized room with poorly positioned benches.
Start by answering four questions:
- How many people will normally use the sauna?
- Should users sit only, or should at least one bench be long enough for lying down?
- Which heater type will be used?
- Where will the door, glazing and ventilation openings be placed?
Â
As a general planning allowance, provide approximately 600 mm, or about 24 inches, of bench width per seated person. For lying down, a clear bench length of around 1,800–2,000 mm is usually more comfortable, depending on the user.
Bench and ceiling relationship
Heat rises, so the relationship between the ceiling, upper bench and heater is more important than the room height alone. In many well-designed saunas, the upper bench is positioned approximately 1,000–1,200 mm below the ceiling. The exact arrangement depends on the heater, bench depth, number of levels and intended bathing style.
A useful traditional principle is to keep the bathers’ feet at or above the upper level of the heater stones where the design allows. This helps reduce the uncomfortable contrast between a hot upper body and cold feet.
Do not finalize the benches before selecting the heater. Every heater has specific minimum clearances and room-volume requirements that may change the layout.
For a compact outdoor option, the ULA sauna series offers space-efficient models for approximately two to six people. For larger, fully insulated designs, explore the Jonas sauna series.
Check Regulations, Utilities and Budget
Rules differ substantially between countries, states and municipalities. Before construction begins, check whether the project requires planning permission, a building permit, electrical inspection, chimney approval or a structural assessment.
Outdoor saunas may be subject to rules covering:
- distance from boundaries and other buildings;
- maximum height and floor area;
- fire separation;
- wastewater and drainage;
- protected areas or environmental restrictions;
- electrical supply routes;
- wood-burning appliances and emissions.
Â
Indoor projects may require approval for changes to ventilation, electrical systems, walls or floor loading.
Your budget should include more than the visible timber. Allow for the foundation, structural frame, insulation, vapour control layer, battens, interior panelling, exterior finish, roof, door, glazing, heater, stones, electrical work, ventilation components, lighting, benches, fasteners, transport and finishing materials.
The final cost varies too widely by country, size and specification for a single universal DIY price to be reliable. Prepare a complete bill of materials and obtain local quotations before committing to the design.
Choose the Construction System
Two common outdoor sauna approaches are solid-timber construction and insulated timber-frame construction.
Solid-timber sauna
A solid-timber sauna uses interlocking timber profiles to form the visible internal and external wall surface. It provides a natural, traditional character and a comparatively straightforward assembly system. Performance depends on timber thickness, joint quality, climate and exposure.
Celsium Craft saunas use 44 mm interlocking solid timber and do not contain additional wall insulation. Examples include the ULA, Joris, Herkus and selected modular series.
Insulated timber-frame sauna
An insulated sauna has a structural timber frame with insulation, an internal sauna-rated vapour control layer, ventilation battens and interior panelling. The exterior receives its own weather-resistant build-up.
This construction gives greater freedom to use different materials inside and outside. It can also provide improved heat retention and more consistent all-season performance, particularly in demanding climates.
Celsium Thermal saunas are insulated through the walls, floor and roof. Interior choices include Aspen, Thermo Aspen and Black Alder, while exterior options include Thermo Pine, Thermo Radiata Pine, Thermo Ash and Yakisugi.
Compare these systems in the Celsium Design & Build guide.
Select Suitable Sauna Materials
Materials inside a sauna experience repeated heating, cooling and humidity changes. They should remain comfortable to touch, resist movement and avoid inappropriate coatings or chemical emissions at elevated temperatures.
Interior panelling
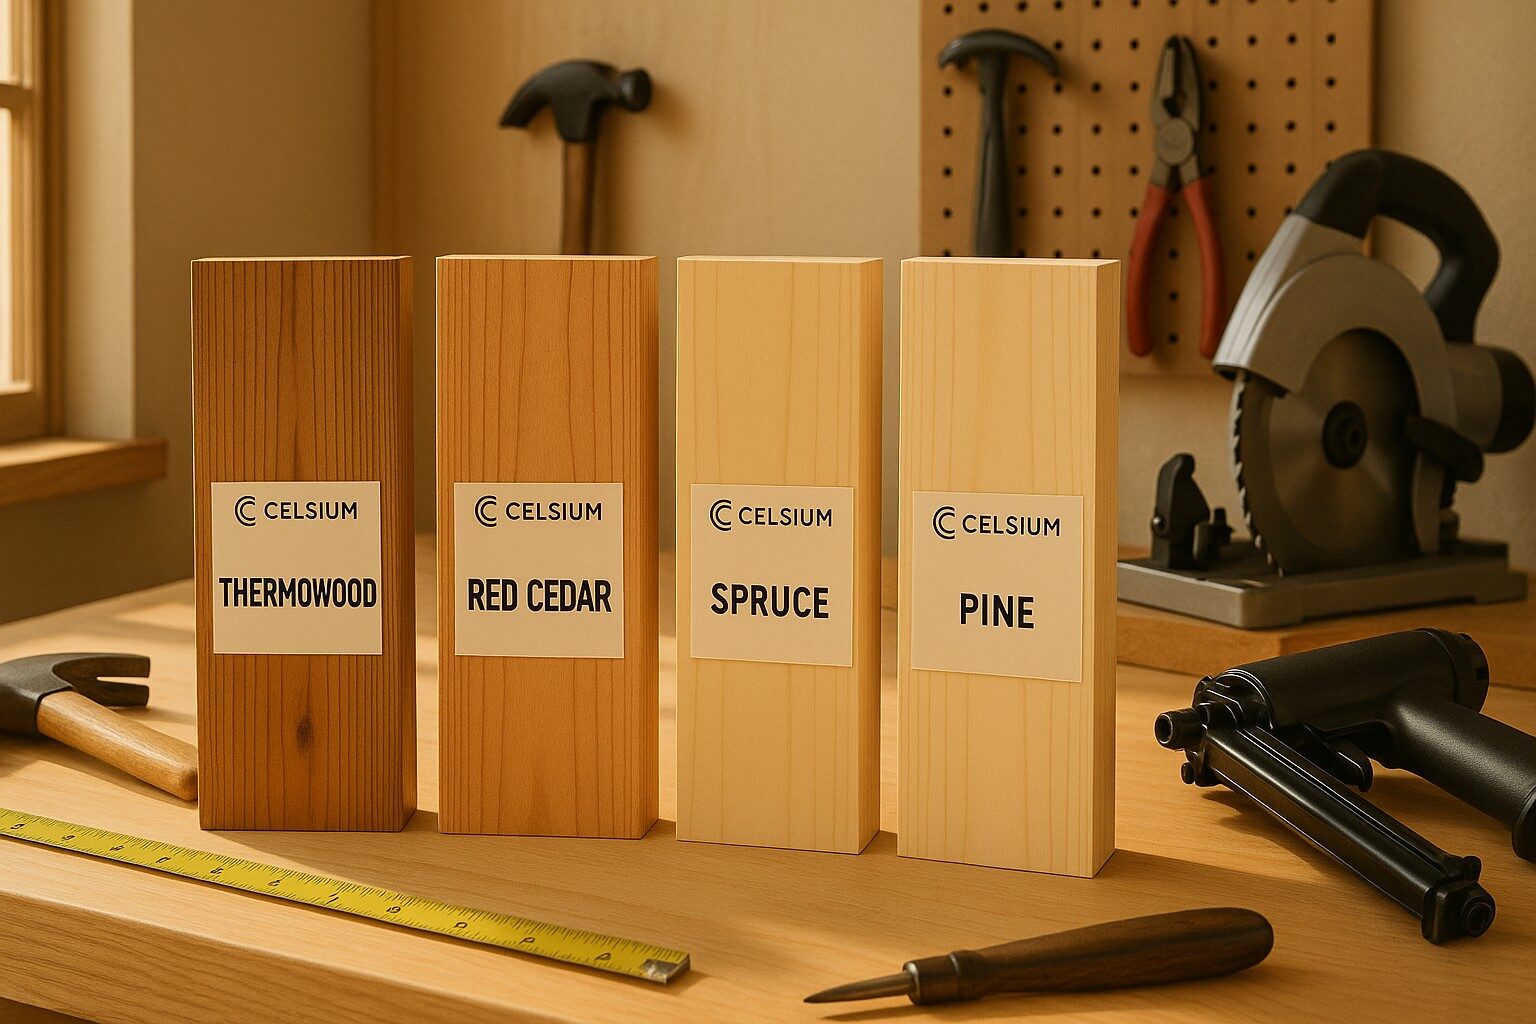
Common sauna interior species include:
- Aspen;
- Thermo Aspen;
- Black Alder;
- carefully selected ThermoWood® profiles;
- other locally approved sauna-grade timber.
Â
Interior boards should be dry, accurately machined and suitable for sauna conditions. Profiles with excessive resin, sharp defects or exposed metal fixings should be avoided in areas that users may touch
Benches and backrests
Bench timber should be smooth, low-splinter and comfortable against bare skin. Aspen and alder are widely used because they remain pleasant to touch and can be finished with clean, rounded edges.
Use hidden or recessed stainless-steel fixings wherever possible. Metal screw heads exposed on the seating surface can become dangerously hot.
Framing and substructure
Use structurally suitable timber of the dimensions required by the design and local code. Timber in contact with a foundation must be protected from ground moisture using an appropriate separation layer or approved foundation detail.
Pressure-treated timber should not be used indiscriminately inside the heated sauna envelope. Check the product’s intended application and keep treated materials away from hot, touchable interior surfaces unless specifically approved for that use.`
Insulation and vapour control
Mineral wool is commonly used in framed sauna walls and ceilings because it tolerates elevated temperatures and fits easily between studs. Other insulation systems may also be suitable, but their temperature rating, fire performance and complete wall build-up must be verified.
On the warm side of an insulated traditional sauna, use a sauna-rated aluminium foil vapour control layer. Seal overlaps, corners and penetrations with compatible foil tape. Ordinary internal plastic sheeting should not automatically be assumed suitable for sauna temperatures.
Glass, fixings and finishes
Use safety glass specified for the application and temperature conditions. Sauna doors must not lock users inside and should open outwards. Use corrosion-resistant fasteners, and choose sealants, lighting and electrical components specifically rated for their location and operating temperature.
Avoid conventional varnishes or paints on hot interior surfaces. Use only products whose manufacturer explicitly approves them for sauna interiors and follow the application instructions.
Prepare the Site and Foundation
An outdoor sauna needs a stable, level and well-drained base. The correct foundation depends on the building size, soil, frost depth, slope and local construction practice.
Common options include:
Concrete slab
A reinforced concrete slab provides a durable, permanent base and can simplify cleaning and floor drainage. It requires correct excavation, sub-base preparation, reinforcement, moisture protection and frost detailing.
Concrete piers or pads
Piers or engineered pads can elevate the sauna above the ground and reduce excavation. Their depth and spacing must be designed for local soil and frost conditions.
Ground screws or screw piles
Ground screws can provide a fast, low-disturbance solution and work well on certain sloping sites. They should be specified and installed for the expected structural loads and soil conditions.
Prepared block or plinth base
Small sauna kits are sometimes supported on concrete blocks placed over a compacted granular base. This can be economical, but it is more sensitive to settlement and seasonal movement. The support points must correspond with the structural base frame.
Whatever system is selected, water should drain away from the sauna, timber should remain separated from soil, and air should be able to circulate beneath elevated structures. Confirm the finished foundation dimensions and level before the sauna components arrive.
Build the Floor, Walls and Roof
For an outdoor framed sauna, the base frame, walls and roof form one continuous structural system. Follow a project-specific drawing rather than relying only on generic dimensions.
Floor
The floor must support the walls, heater, stones, benches and users without excessive movement. In cold climates, an insulated floor can significantly improve comfort and reduce heat loss.
Plan cleaning and water management from the start. Some saunas use a drained waterproof floor; others rely on controlled use of water and a moisture-resistant surface. The appropriate solution depends on local rules, expected usage and whether the sauna is residential or commercial.
Walls
Build wall frames square and plumb. Include structural support or blocking wherever benches, backrests, the heater guard or wall-mounted equipment will be fixed. Frame the door and windows according to the actual product dimensions, including installation tolerances.
Roof
Outdoor roofs must be designed for local snow, wind and rain loads. Provide an adequate slope, waterproof roof covering, flashing and controlled drainage. A ventilated roof build-up may be necessary to reduce condensation risk, depending on the construction.
Protect the external structure with a suitable weather-resistive layer and ventilated cladding system. Premium exterior choices can include Thermo Pine, Thermo Radiata Pine, Thermo Ash and Yakisugi, also known as Shou Sugi Ban.
Install Electrical and Heater Preparations
Plan electrical routes before closing the wall build-up. This includes the heater supply, controller, temperature sensor, lighting, optional speakers or infrared emitters and any external controls.
The required voltage and circuit capacity depend on the heater model and the electrical system used in the destination country. Never assume that a heater suitable for one market can be connected unchanged in another.
Electric sauna heaters commonly require a dedicated supply and professional installation. The electrician should work from the heater manufacturer’s current wiring diagram and coordinate cable routes, sensor location, controller position and required protective devices.
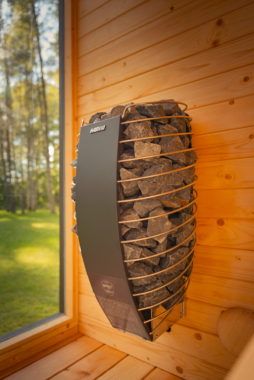
Wood-burning heaters require a correctly designed non-combustible base, wall protection, combustion air and an approved chimney system. Clearances must follow the stove and chimney manufacturers’ documentation as well as local fire regulations.
Do not guess heater output from floor area alone. Heater selection is based primarily on the heated room volume, but glass, uninsulated masonry and other heat-absorbing surfaces can increase the effective volume used in the calculation.
Install Insulation, Foil and Interior Battens
Once structural work and concealed services are complete, install insulation without gaps or excessive compression. Pay particular attention to the ceiling, where heat loss can be greatest.
Fit the sauna-rated aluminium layer continuously on the warm side of the insulation. Overlap and tape every joint. Seal penetrations carefully around cables, sensors and ventilation ducts. Poor sealing can allow humid air to enter colder parts of the structure and create hidden condensation.
Install timber battens over the foil before fitting the internal lining. This service cavity protects the foil, provides fixing support and allows the interior panelling to dry more effectively. The exact cavity and batten arrangement should follow the wall-system design.
The exterior side of an outdoor framed wall requires a separate, climate-appropriate moisture and ventilation strategy. The internal foil is not a substitute for correct external weather protection.
Design Sauna Ventilation Correctly
Ventilation is essential for fresh air, comfortable heat distribution and drying after use. There is no single vent arrangement that is correct for every sauna.
The correct design depends on:
- electric or wood-burning heater;
- natural or mechanical ventilation;
- heater manufacturer instructions;
- room shape and bench positions;
- the pressure conditions in the surrounding building;
- residential or commercial usage.
Â
With natural ventilation, an air inlet is often located near the heater and an outlet is placed on the opposite side. Mechanically ventilated saunas may use a different inlet position, sometimes above or near the heater, with extraction lower on the opposite wall. A separate high-level drying vent may also be included.
Because incorrect ventilation can create cold feet, stale air or uneven temperature, coordinate the vent positions with the heater and bench layout before closing the walls. Follow the current heater instructions and local ventilation requirements.
For a fuller explanation, read Understanding Sauna Ventilation.
Install Interior Panelling
Before installation, allow the timber to acclimatise in clean, dry conditions according to the supplier’s guidance. Sort boards so that colour and grain are distributed intentionally.
Install ceiling boards first or according to the chosen detail, followed by the walls. Use stainless-steel fixings positioned in the profile so they remain hidden where possible. Maintain the required expansion clearances at corners and junctions.
Do not puncture the foil unnecessarily. Fix the lining to the internal battens rather than directly through the complete wall build-up wherever the design permits.
Create neat, removable trims around service points that may require future inspection. Do not permanently conceal heater connections, sensors or ventilation controls that need maintenance access.
Build Safe and Comfortable Sauna Benches
Good benches determine how the sauna feels in use. They should be stable, easy to clean and proportioned for both sitting and lying down.
Typical planning ranges include:
- upper bench depth of approximately 500–650 mm;
- lower bench or foot platform depth appropriate to safe movement;
- approximately 600 mm of seating width per person;
- small, even gaps between bench boards for drainage and airflow;
- rounded exposed edges and corners.
Â
These are design guidelines rather than universal rules. The correct dimensions depend on the room, number of levels, heater and accessibility requirements.
Use the structural blocking installed inside the walls to support wall-mounted bench frames. Where possible, make lower sections removable or hinged so the floor can be cleaned. A gently angled backrest can improve comfort and also create space for indirect lighting.
Maintain every heater clearance stated by the manufacturer. Add a stable heater guard where appropriate, but ensure that it does not restrict the required airflow around the heater.
Install the Door, Lighting and Accessories
The sauna door should open outwards and must be easy to release without a key. Avoid locks or mechanisms that could trap a user inside. Use heat-resistant handles with a comfortable timber surface on the sauna side.
Lighting should be warm, indirect and suitable for its exact temperature and moisture zone. LED strips are often placed below benches or behind backrests, but not every LED product or driver can tolerate sauna conditions. Drivers and power supplies may need to remain outside the hot room.
Useful finishing accessories include:
- thermometer and hygrometer;
- bucket and ladle;
- sauna stones approved for the selected heater;
- headrests and backrests;
- a session timer;
- towel hooks outside the hot room;
- protective flooring or removable duckboards where appropriate.
Â
Explore selected Celsium sauna accessories designed to complete the sauna experience.
Commission the Sauna Before First Use
Do not use the sauna immediately after completing the visible interior. First carry out a systematic inspection and commissioning process.
Check that:
- the heater and controls have been installed and tested by a qualified person;
- all manufacturer clearances are maintained;
- the temperature sensor is in the specified location;
- ventilation openings operate correctly;
- the door opens freely outwards;
- benches and guards are stable;
- no sharp edges or exposed hot fixings remain;
- the correct quantity and type of stones have been loaded properly;
- lighting and controls work without overheating;
- construction dust and packaging have been removed.
Â
The first heating cycle may release normal odours from new materials and manufacturing residues. Follow the heater and material manufacturers’ commissioning instructions, ventilate the room thoroughly and do not occupy it until this process is complete.
Sauna Maintenance and Energy Efficiency
After each session, allow the room to dry. Use the ventilation system as intended, open the door when appropriate and lift removable bench or floor sections if this forms part of the design.
Routine care should include:
- sitting or lying on clean sauna towels;
- wiping excess moisture after use;
- cleaning benches with products approved for sauna timber;
- checking ventilation openings for obstruction;
- inspecting heater stones and replacing deteriorated stones as required;
- checking exterior cladding, roof drainage and sealant joints;
- renewing approved timber protection according to the product instructions.
Â
Never pressure-wash the interior or saturate hidden parts of the structure. Avoid household chemicals that may remain in the timber and produce odours when heated.
Energy consumption is influenced by sauna volume, insulation, glazing, climate, heater output, warm-up time and user habits. A correctly sized heater in a well-insulated room is normally more efficient than an oversized room or a poorly sealed structure. Read more in Energy-Saving Home Saunas.
Build It Yourself or Choose a Pre-Crafted Sauna?
A fully DIY sauna offers control over dimensions, materials and details, but it also requires accurate construction, safe electrical work and a clear understanding of heat and moisture management. Errors hidden behind the internal panelling may be difficult and expensive to correct later.
A factory-prepared sauna can offer a faster and more predictable route. Components are produced in controlled conditions, coordinated as one system and prepared for delivery and installation.
Explore the Celsium Pre-Crafted Collection or the flexible Jonas Modular sauna series. For a project created around a particular building, landscape or commercial concept, discover Celsium bespoke sauna design.
Frequently asked questions (FAQ)
Can I build a sauna myself?
An experienced DIY builder can complete parts of a sauna project, particularly the timber frame, internal lining and benches. Regulated electrical, structural, chimney and fire-safety work should be designed, completed or inspected by appropriately qualified professionals.
What is the best wood for a sauna?
There is no single best species for every component. Aspen, Thermo Aspen and Black Alder are strong choices for interiors and benches, while thermally modified timber is widely used for durable exterior cladding. Select materials according to their location, touch temperature, stability, appearance and maintenance requirements.
Does a sauna need insulation?
An insulated framed sauna normally provides more stable heat retention, especially outdoors and in colder climates. A properly designed solid-timber sauna can be built without additional wall insulation, but its performance depends on wall thickness, joints, size and local climate.
Does a sauna need a vapour barrier?
An insulated traditional sauna generally requires a continuous sauna-rated vapour control layer on the warm side of the insulation. A solid-timber system has a different wall build-up and should follow the manufacturer’s construction details.
How should a sauna be ventilated?
Ventilation must be coordinated with the heater type, bench layout and natural or mechanical airflow system. Follow the heater manufacturer’s current instructions and the requirements applicable to the building. Avoid copying a generic two-vent diagram without checking whether it suits the selected system.
How do I choose the correct heater size?
Use the heater manufacturer’s room-volume calculation. Include adjustments for glass and other uninsulated surfaces where required. Check the available electrical supply, safety clearances and control system before purchasing the heater.
Should a sauna door open inward or outward?
It should open outwards and be easy to release without a key so that users cannot become trapped inside.
How long does a sauna take to heat?
Warm-up time varies with room volume, heater output, insulation, glazing, starting temperature and desired bathing temperature. Use the manufacturer’s performance information rather than relying on a universal estimate.
How long will a well-built sauna last?
Service life depends on construction quality, ventilation, drying, climate, frequency of use and maintenance. A correctly designed and maintained sauna can provide many years of reliable use, while trapped moisture and poor detailing can shorten its life significantly.
Ready to Create Your Sauna?
Whether you are planning a compact indoor sauna, a fully insulated outdoor retreat or a custom commercial wellness space, the construction system will determine its comfort, efficiency and durability.
Explore the complete collection of Celsium outdoor saunas, discover our indoor sauna models, or contact the Celsium team to discuss dimensions, materials, heating options and worldwide delivery.
Designed and manufactured in Europe. Crafted since 1994. Delivered worldwide.